dinner

Demystifying Lamb: Advice Straight from the Rancher

This post is one of a series of posts I’m sharing about Sacramento IFBC 2016. In exchange for a discounted ticket, I agreed to share my own personal experience about IFBC on my blog.

“Agriculture was not always a source of pride for Sacramento.” Mary Kimball, Executive Director of Winter, California’s Center for Land-Based Learning shared that sentiment with an audience of food bloggers during an IFBC Panel on what it really means to be America’s Farm-to-Fork Capital.

f2fpanel
That lack of pride changed when perspectives started to shift, thanks to a full on Farm-to-Fork campaign launched by the Sacramento Convention & Visitors Bureau. As consumers, farmers, and retailers started to feel more connected, and the story of Sacramento’s agricultural bounty was told, it became a shared experience for everyone involved in the local food cycle, from start to finish. These days, it’s a story most Sacramento residents will gladly share.

Pride in his product came through loud and clear as lamb rancher Ryan Mahoney showed us around Brown Road Ranch in Rio Vista. While the bloggers on the tour peppered him with questions about everything from the stock, to feeding cycles, to how the lamb gets to market, it was easy to see his sincere interest in making sure we all “got it,” and came away with a real education. Of course, because we’re food bloggers, we quickly started digging around about flavor and recipes we could share to help home cooks get the very best from the lamb they buy, regardless of the cut. A quick peek at Ryan’s Instagram account (@californiasheeprancher) shows he eats plenty of his own product, and from chops to meatloaf, he knows what he’s doing.

The first thing we all wanted to know—what’s the difference between American lamb and the product from New Zealand and Australia? American lamb is bred for flavor, as opposed to the Merino stock the imported product comes from, which was primarily bred for wool.  That means American lambs go to market about 30 pounds bigger than the imports, on average, with more even fat distribution and better platability, which refers to the tenderness, juiciness, and flavor of the cooked product.

IMG_2587

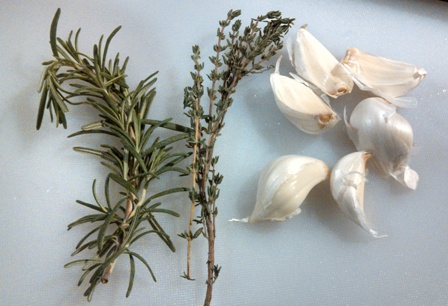
I’ve heard people say they’re a little intimidated by the idea of cooking lamb at home. But I say, don’t be scared! While the flavor is different, the same basic cooking rules as the ones we follow for beef still apply.   Among the more tender cuts, Ryan says the easiest cut to cook is the center loin chop, seasoned with garlic salt, pepper and rosemary then grilled just like a steak.

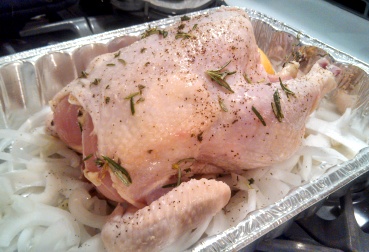
Harder working, tougher muscles get lower heat with longer cooking time– think braising or stewing. He shared his family recipe for a leg of lamb.. Marinate the leg overnight in a mixture of brown sugar, Dijon mustard, lemon pepper and soy sauce. Braise it in low, moist heat in the oven, then reduce the marinade down in a pot on the stove to use as a sauce. Lamb shanks are even easier, and slow cooker friendly. His advice? “Throw ‘em in a Crock Pot with a bunch of stuff and they come out real tender and good.”

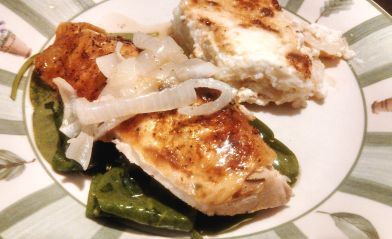
Just before sitting down to write this post, I noticed a picture of a lamb meatloaf Ryan posted to his Instagram account. I immediately asked for the recipe. He wasn’t very specific about some of the seasoning amounts, so I had to play around a little to find the right ratios. But, I think I figured out a version that worked well. We ended up with moist, juicy meatloaf that was packed with deep, complex flavor, and will make some excellent meatloaf sandwiches later in the week.  Give it a shot, and tell me what you think.

IMG_2902

Equipment:
Knife and cutting board
Measuring cups and spoons
Mixing bowl
Rubber spatula, or maybe just a pair of disposable gloves if you’re mixing by hand
Loaf pan

Ingredients:
1 lb ground American lamb
1 lb ground beef chuck
1 C milk
1 egg
1 T Kosher salt
½ T lemon pepper
½ tsp smoked paprika
1 T garlic, finely chopped
½ medium white onion, small dice
1 T fresh ginger, or ¼ tsp ground ginger
1 tsp ground sage
¼ tsp mustard powder
1 T Worcestershire sauce
3-4 shakes of your favorite hot sauce (I used Cholula)
Pan spray

Preheat your oven to 350°. Spray the loaf pan generously with pan spray and set aside. Combine all the ingredients in a large mixing bowl until just evenly combined. Don’t overmix.

Pour the mixture into the loaf pan, evening out the top with the spatula. Bake for 1 hour and 15 minutes, or until the internal temperature reaches 160° on your meat thermometer. Allow to rest for 15 minutes, then slice and serve. Should make eight slices.

If you’re a beer fan, like me, pair it with a rich, malty Porter. Yum! Looking for other pairings? Check out this cool chart on the American Lamb Board website.

Wait, what? You don’t have a meat thermometer, you say? You don’t have a cutting board? You don’t really understand all those cuts I mentioned? Don’t fret, my pet! I just might be able to help. Thanks to the folks at the American Lamb Board, I’m going to hook up one of you with a fun little goody bag full of everything you need to get started exploring the wonderful world of American lamb.

IMG_2908

Inside the reuseable lunch bag, you’ll find a meat thermometer, a flexible cutting board, a cute little tin of a wonderful seasoning blend you can use on just about any cut of lamb, a great collection of lamb recipes as well as a little “Curriculamb” education on lamb cuts, and a few other goodies.

All you need to do to win is leave a comment below telling me your favorite way to eat lamb. If you’ve never tried it, let me know that, too. The winner will be drawn randomly at 7pm MST on Saturday, August 13th and announced on my Facebook page, so be sure to go over there and hit that “Like” button to be sure you stay in the loop.

Damn, Herbs… You is fiiiiiiiiiiine!

There are French chefs rolling in their well buttered graves right now over that joke. I’M NOT SORRY!

It’s poaching and braising week at school. We’re cooking a lot of chicken. So. Much. Chicken. Both nights of our practical? Chicken. We made a beef dish once, during roasting week, and it was beautiful. I’m looking forward to taking American Regional next quarter, because I’m pretty sure we’ll get to do things with other kinds of meat. Meat that is not chicken.

chickenhypnotist

But I digress. We’re gonna dance with what brung us, and this week, it’s chicken. Chicken in Fine Herb Sauce, to be exact. It’s actually a really yummy dish, and not TOO much effort, really. You can serve it with rice and something green or orange or yellow and it will be a wonderful meal with all food groups represented and whatnot. Or something. I dunno.

Equipment:
1 medium saute pan
measuring cups and spoons
1 large sheet of parchment paper to make a parchment paper lid (instructions here)
tongs
cutting board and knife
whisk
cheesecloth
small plate or other type of container for holding the chicken while you make the sauce
piece of foil large enough to cover said container
fine mesh strainer and a bowl into which you will strain the poaching liquid (optional)

Ingredients:
4 (4-5 oz) boneless, skinless chicken breasts
1 1/2 oz. cold butter
2 oz minced shallots
2 oz white wine
8 oz chicken stock
Salt and White Pepper (or regular pepper, since you’re probably just cooking this for home and not some snooty food critic who is going to be completely scandalized if they can actually see the pepper in your sauce.)
1 oz all purpose flour
6 oz heavy cream
2 T each finely chopped fresh parsley, chives and dill

Preheat the oven to 325°.

Mix the flour and 1 ounce of butter together to form a paste. This is called a beurre manié or “raw roux.” It will be used to thicken your sauce to a nappé consistency, which basically just means it is still pourable, but should be just thick enough to coat the back of a spoon.

Mince all your herbs, and collect them in a large square of cheesecloth (or you can just  use a mesh strainer, or a coffee filter). If you’re using cheesecloth, tie it up into a little bundle. Rinse the herbs under cold water, wringing the water out periodically until it runs mostly clear.  Lay your rinsed herbs out on a paper plate or something flat to let them dry.

blog_herbs

Why are you doing this? Because all those herbs contain chlorophyll, the stuff that makes them green. By rinsing out some of that chlorophyll, you’ll help ensure that your lovely sauce doesn’t become discolored. I’d say you could skip this step if you really felt lazy, but honestly, when done right this simple little sauce kind of makes the dish. Maybe the people you’re feeding won’t know the difference if your sauce is a little green, but if I’m going to be a stickler about one thing, it’s this step. Just do it. You’ll feel better. Or I will feel better, and it’s all about my needs, dammit!  (Just kidding. Sort of. Ha!)

Season the chicken breasts with the S & P.

Cover the bottom and sides of the saute pan with 1/2 oz of the butter. Sprinkle the minced shallots on top of the butter. Place the chicken on top of the shallots, then add enough wine and stock to come about halfway up the sides of the chicken.

blog_poach
Place the pan on the stove over medium heat just until you see bubbles start to appear. Cover with your parchment lid (it’s called a cartouche. isn’t that fun? carrtoooooooooooosh!), and pop the whole thing in the oven until the chicken is just cooked through.

blog_parchment
I used two large breasts instead of four smaller ones, and it took about 15 minutes. You probably also noticed that I poached the chicken with the skins on.  That’s what our recipe said to do, but that’s just stupid. You can’t eat the skin after you poach it because it’s all rubbery and disgusting, so just buy the skinless ones to start or remove the skin before you poach.

Once the chicken is poached through, remove it from the pan to your holding container. Cover it very loosely with foil to keep it warm. Don’t cover it so tightly that the steam can’t escape, because you’re not trying to steam away that beautiful poaching job you just did, right?

Now it’s time to make the sauce, and the question becomes… to strain or not to strain? Again, if you were cooking for some food critic who was going to have a conniption over little pieces of shallot in their sauce, you’d strain it. If this is just for dinner at home, feel free to skip that step. If it was me and I was cooking for company, I’d probably go ahead and strain, but that would really depend on how much I was trying to impress them. Chances are good that I would find some way to completely invalidate any impression that I was Lady Smooth McSmoothington by tripping over air or having a large piece of parsley stuck in my teeth so it’s kind of a moot point, but A for effort, right?

Anyhoots, for the sake of argument, strain the liquid into a bowl, then pour the strained liquid back into your saute pan. Reduce the liquid by about 25%, then add the cream and reduce again by about 25%.

Over medium low heat, whisk the sauce while adding the beurre manié a little bit at a time until your sauce reaches the right consistency. You probably won’t use all of it. Conversely, if your sauce is getting a little too thick, you can just whisk in a little warm stock until it’s thinned out to the right consistency. MAGIC!

Just before you’re ready to serve, stir/whisk in the herbs. Give the sauce a final taste and adjust the seasoning as needed.

blog_sauce

Plate up your chicken and whatever sides you’re serving with it, and drizzle about 1 oz of sauce over the chicken. It doesn’t take a ton of work to make a pretty plate with this recipe.

blog_final
Ta da!

From the Suggestion Box: My Favorite Favorite

About a month ago, I asked folks on my Facebook page for suggestions on what kinds of posts they’d like to see here. Nikki (who I’ve known since 7th grade) asked me to make my favorite recipe by my favorite chef.

My favorite chef, in case you haven’t been reading this whole time (Why is that, again?) is Julia Child. There are so many reasons for that, but I could take a whole post just talking about all of them and I promised an actual recipe so I’ll just refer you here. My favorite recipe from her? Gosh. That’s a lot more difficult to pinpoint. I had to think about it because it’s so hard to separate the recipes I like watching her cook and the recipes that I actually enjoy cooking. The conclusion I came to was that despite the fact that she might be known for complicated, multi-step French recipes, it’s the really straightforward ones that I think epitomize her style the most. She was humble before the food, and very good at letting it be what it is without a lot of fussing. So, I chose this recipe for Herb, Lemon, and Garlic Roast Chicken. It’s one you can easily duplicate at home without having to hunt down special ingredients or equipment. I made one replacement, and I didn’t follow the steps exactly because I just didn’t have the room to spread out like she did, so I’ll walk you through how I did it.

Equipment:
1 large roasting pan or baking dish
1 Mixing bowl
Knife and cutting board
Measuring spoons
Plate
Tongs
Whisk
Aluminum foil
Measuring spoons

Ingredients:
2 lemons, halved, juiced and halves reserved
4 sprigs thyme
2 sprigs rosemary
6 cloves garlic, crushed, unpeeled
salt and fresh ground black pepper as needed
4-5 lb whole chicken
1 onion, sliced
1 tbsp olive oil
1/2 cup chicken stock or broth
2 tbsp walnut or hazelnut oil
2 bunch watercress, stemmed, washed and dried (I actually used fresh spinach because there wasn’t any watercress to be found at King Soopers. Use whatever leafy green you like.)

Preheat your oven to 400°.

Get your mis en place ready first, so the rest of the process goes fast.

Grab your herbs and the garlic.
herbs
Smash the garlic cloves, then chop one of them, plus  half of a sprig’s worth of rosemary leaves and one sprig’s worth of thyme leaves. Add them to the bowl with your lemon juice, plus the salt and pepper. I actually removed the lemon pieces before the next step with the chicken.

lemonbowl

Slice up your onions and put them in the bottom of your roasting pan.

onion
Put the whole chicken into your mixing bowl and coat it well all over the outside with your lemon juice/herb mixture. Season the inside of the chicken really well with salt and pepper, then place it in the pan on top of the onions. Pour whatever lemon juice is left over the chicken, drizzle it with the olive oil, and sprinkle the whole thing with salt. Stuff the lemon halves, the remaining whole sprigs of herbs, and the smashed garlic cloves inside. I think it’s more important that you get all the herbs and garlic in there, so if you don’t have room for all the lemon halves, try to get as much in there as you can. I stopped at three. Wash out the bowl because you’ll use it again when the chicken comes out of the oven.

I did not have twine (bad preparation on my part) so I wasn’t able to tie the legs together, as the recipe says. I should have, and normally I do because it just makes for a prettier chicken. Plus, it seems to cook more evenly when I do that. However, this time we went with the less dignified version. Poor chicken, here she is, legs akimbo, stuffed to the… whatever. So humiliating. Sorry, chicken!

raw
Pop the chicken into the oven for about an hour and 15 minutes. If you’re nervous about chicken cooking temps at all, use a meat thermometer before you pull it out of the oven to check. Measure at the thickest part of the meat in at least two places, without touching any bone. You want a minimum internal temperature of 165°.

Feel free to sit down and have a glass of wine or something while the chicken roasts, because you really can’t do the next step until it’s out of the oven. No, really, put your feet up! Watch that episode of Supernatural you’ve been saving on the DVR and let that chicken do what it’s doing.

(brief interlude to ask The Universe how Jensen Ackles could have possibly come to be that good looking.)
Jensen-Ackles-Celebrities

Ok. Back to reality.

When your chicken is all done roasting, pull it out of the oven and move it to a plate with your tongs (or whatever’s handy).

chicken

Poor chicken. It’s even more humiliating from this angle. Cover her loosely with some foil while she rests and let her have a moment to herself.

Strain the hot liquid from the bottom of the roasting pan into a bowl.  The chicken stock listed in the ingredients should be used to deglaze your roasting pan/baking dish. Since I used one of those throw away aluminum jobs, I didn’t really do that step. However, if you’re using a real pan that you can put over heat and properly deglaze, that’s what the stock is for. Pour your deglazing liquid into the bowl as well, and then whisk in the walnut/hazelnut/olive oil (Whatever you have is fine. I used walnut.).

What you’re basically doing here is making a pan sauce masquerading as a vinaigrette. Toss whatever greens you’re using in the vinaigrette. They’ll wilt slightly, or maybe more than slightly, depending on how hot the liquid still is and how much you toss it around. Adjust the seasoning as you see fit and give it all another little toss.

spinach
Annnnnd… you’re pretty much done! Plate it up and call everyone to the table. Time to grub!

I made some Dauphinoise Potatoes (fancy au gratin potatoes) as a side dish.|

serve
I hope you’ll try this one, because it’s really delicious and, as Julia’s recipes go, pretty flipping easy to get together. The lemon adds some nice brightness, and using the pan juices to make that vinaigrette brings a little something special to what would normally be just a plain roasted chicken recipe.

Bon appétit!

bonappetit

Farmer’s Market Dinner

Tonight’s dinner menu